
Changing an ATV tire is impossible if you don’t have the right tools, but if you are sufficiently equipped, it’s a piece of cake.

Here’s what you’re going to need…
- A Tire Iron – These are used to pry the wall of the tire you wish to remove away from the wall of the rim. If you don’t have any, I recommend this Dr.Roc Tire Spoon Lever kit. It comes with rim protectors, three different irons, and it’s tried and tested.
- A Bead Breaker – I know what you’re thinking…what the hell is a bead? Well, the bead is found on the edge of the tire, and it features a robust metal cable that runs around its entire circumference.
The tire bead is mounted onto the bead retainer on the rim, a sizable bump near the lip. Essentially, the beading system ensures that the tire is held firmly in place no matter how much abuse you give it on the trail.
It’s not only ATVs that have such a feature, but as off-road riding is particularly rough on hardware, the tire bead and bead retainer needs to be more prominent. In light of this, ATV beads are infamously difficult to break.
Many riders craft their own bead breakers out of things they have lying about, which is great, but it’s time-consuming, and if you don’t get it just right, you risk damaging your rim.
There are some DIY methods that are straight-up dangerous for your rims. Some riders, for example, go as far as riding over the edge of the old mounted tire in another heavyweight vehicle.
Even though some people post on forums about the efficacy of this free method, there’s a huge chance you’ll damage a component, and then it won’t be so free after all.
Another bad idea is to lay the tire out flat on the ground, make a ramp with a wooden board coming to rest as close to the rim as possible, then driving a truck up the ramp. This method rarely works efficiently, and there’s a ton of risk involved.
I personally recommend just investing in a proper bead breaker. Something like this BESTOOL Pneumatic Bead Breaker will work a peach!
Alternatively, you can make a relatively safe DIY bead breaker with two boards of hardwood, a couple of hinges, and a sturdy wall or post.
- Liquid Dish Soap – You’ll be using this stuff purely for lubrication. By the time you finally pry that old tire free from your rim, you’re going to be tuckered out, making mounting the new tire a real slog. Not to worry, though, friend. Give your rim a good lathering with soap and that new tire will slip right on into place – perfect!
You may find the tire changing process quite difficult the first few times you try it, but as is the case with most things, you’ll eventually find the knack, and it will become second nature.
Read More: Comparing the Top ATV Mud Tires
How do you balance ATV tires?
Getting your tires balanced professionally isn’t the most expensive bit of maintenance in the world, but it’s still money at the end of the day. If you can get the job done on your own for less, why wouldn’t you?
There are a few different DIY balancing methods, but much like DIY bead breaking, some are downright terrible ideas, so I’m going to stick with the one I know to be the safest, most effective, and most popular.
Here’s what you’ll need…
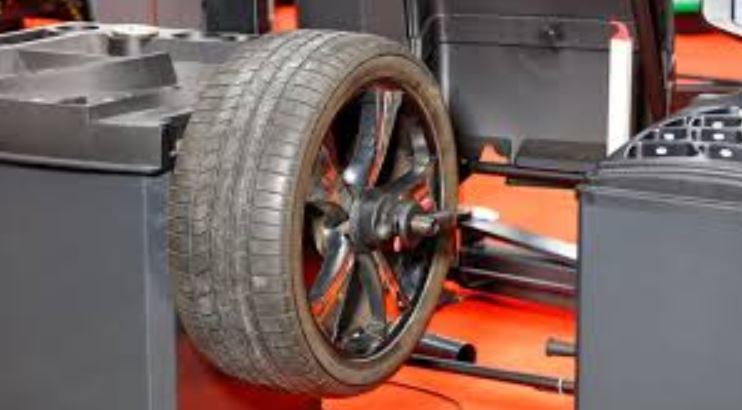
- A Tire Balancer – You’ll be mounting your wheel on the tire balancer which then spins it to determine where weight is required. You’ll need to find one suitable for use with your monster ATV wheels, as not all of them are compatible with large rim diameters. If you’re unsure where to look, start your search with this Portable Bubble Wheel Balancer. It’s made of steel and high-quality plastic, and it’s designed to fit both cars and light trucks, so your ATV should be fine.
- Some Wheel Weights – These are what you’ll use to do the balancing. You can either go for clip-on or stick-on wheel weights. I personally prefer stick-on weights as they’re much easier to work with. These CKAuto Adhesive Stick on Wheel Weights are particularly handy.
- An Old Screwdriver – You’ll use this to pry off the old wheel weights.
Now let’s run through the method…
Step 1. Set Up the Tire Balancer – Clean off any packing residue, and place the tire balancer on a perfectly level surface. You’ll know when it’s ready when the bubble is directly in the center of the level.
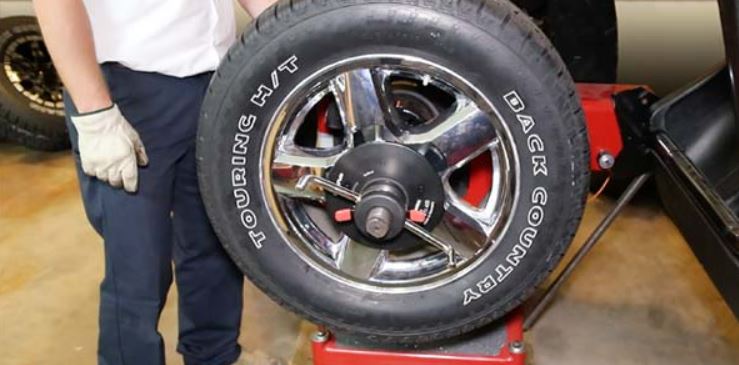
Step 2. Clean your Wheel and Mount it on the Balancer – Before you begin, make sure there is no debris on your tire. Now remove any wheel weights currently in place with your screwdriver.
If their clip-on weights, you may need some pliers, or better yet, this pair of ABN Wheel Weight Pliers. Once they’re removed, all that’s left to do here is mount that wheel on the balancer.
Step 3. Check Tire Weighting – Spin the tire a few times, letting it come to a stop on its own, and note which way the bubble is leaning. Give it another few goes just to be sure.
Step 4. Adding the Wheel Weights – Now you know where the weight is disproportionate, you can even it out with the wheel weights. Remember, the weights should never be fitted opposite one another, or they’ll cancel each other out. As the bubble floats to the light end of the spectrum,
You’ll need to add weight to the side it’s leaning towards. The aim of the game is to get that bubble back in the center again. To make sure the adhesives have fully kicked into action, it’s good practice to hold the weight in place for a solid 20 seconds or so.
What are the symptoms of a wheel out of balance?
The symptoms of a wheel out of balance have a negative effect on the rider’s comfort as well as the performance of the vehicle and its parts. The first thing you’re likely to notice if one or more of your tires is off balance is a vibration in the steering wheel or handlebars when you reach high speeds.
This irritating vibration will spread throughout the flooring of your ATV and will eventually start to vibrate your whole seat. I think we can agree that the trail is bumpy enough in its own right. There’s no need to compound it with the turbulence from off-balance wheels.
Next, you’re likely to notice that you’re either not getting as much mileage as you used to out of a full tank of gas or that your tire treads are wearing away in an uneven fashion.
How do you dismount an ATV tire by hand?
If by “by hand”, you mean, with your bare hands, unfortunately, it can’t be done. To dismount your ATV tire, you’re going to need the tools mentioned in our answer to the first question. To save you scrolling back up and losing your place, I’ll repeat them here.
- Tire Irons
- A Bead Breaker
Now let’s run over the method…
Step 1. Breaking the Bead – if you invested in the bead breaker we recommended, this stage is a total breeze. It will use its pneumatic power to pop your tire loose of the bead in seconds.
Alternatively, you could make your own. I don’t personally recommend using the plank of wood and truck method, but as you’ll see on countless YouTube videos, that will also get the job done.
Once you’ve broken the bead, use a tire iron or old screwdriver to maintain leverage.
Step 2. Loosening Tire with Tire Irons – Using any rim protection you have, run the tire irons around the edge of the rim to loosen the tire off.
Step 3. Wrestling the Tire Off – Now, using your feet if need be, you should be able to completely uncouple the tire.
What causes tires to go out of balance?
The main cause of off-balanced tires is simply time. As you ride your ATV into oblivion, the weights of the tires naturally shift. There’s nothing that can be done to prevent this. It’s just part of the wear and tear our tires develop during use.
Another reason tires can be off-balance is that equal weight distribution isn’t exactly a key concern during the production of wheels and tires. Therefore, they’re bound to be slightly heavier in certain spots. It’s just the way of things.
As it only takes roughly half an ounce to cause off-balance vibration, it’s an incredibly difficult phenomenon to remedy in the manufacturing process.
How long can you drive on unbalanced tires?
There’s nothing to stop you driving on unbalanced tires until they need changing due to wear. The problem with unbalanced tires isn’t that you can’t ride on them, it’s that the ride isn’t as comfortable as it should be, your wheels won’t wear evenly, and your fuel economy takes a hit.
Do all four tires need to be balanced?
To be honest, if you only engage in a bit of slow-speed off-road or utility riding, you won’t need to balance any of your tires, although if you want them to last for as long as possible, it’s still a good idea.
Even with all four tires off-balance, you won’t notice any vibrations in your steering or seat until you reach speeds around the 30mph zone. This is why it’s far more important to balance your tires if you plan on racing, riding a trail, or taking part in any other high-speed event.