
There’s nothing worse than getting your ATV out and it running out of battery, leaving you stranded. When you have made this mistake once, you will never leave the house without a fully charged battery again. If you are in a rush to get out, you will need to know how long it takes to charge your ATV battery.
A battery for an all-terrain vehicle will take anywhere from 3.5 to 10 hours to charge completely. The charge time will vary depending on the manufacturer and model of the battery. Other factors that influence the charging time include the age of the battery, how often it is used, and the quality of your charger.
It is very bad for the health of your battery if you charge it for too long. It can cause the battery to overheat which can damage the component parts. The manufacturer’s information supplied with the battery will state the optimal charge time for your battery model. We strongly recommend checking this information prior to charging your battery for the first time.

How do I test my ATV battery?
If you are considering replacing your ATV battery we recommend taking the time to test it first. Sometimes poor battery performance is due to issues that can be resolved, which can save you money.
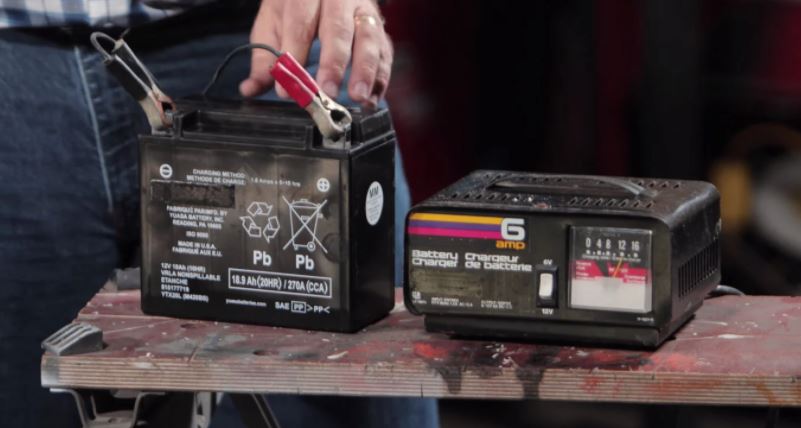
To test your ATV battery, you will need a battery charger, a multimeter (or voltmeter), and a consumer-grade battery load tester. We strongly recommend wearing personal protective equipment such as gloves and safety glasses.
Your first step should be to visually examine the battery for any signs of damage. Look for bumps on the exterior, broken or loose terminals, any melted plastic, cracks, leaks, and discoloration. If your battery has a filler cap then you should also check the fluid level.
You will then need to fully charge the battery. Take it off charge and allow it to settle for 12 hours. This allows the voltage to stabilize and gives you the most accurate reading possible.
Grab your multimeter and measure the voltage when it is not under any load. Disconnect the terminals. Take great care to remove the negative (black) lead first, before the positive (red) one.
If you are using a manual multimeter, set it to “DC voltage 20”. If your multimeter is auto-ranging then set it to “V”. Connect the positive lead to the positive terminal and do the same with the negative.
Check a table like this one to determine the meaning of the reading that you are shown. You should also perform a load test. This ensures that the voltage does not drop significantly when a high load is applied. Connect the battery terminals to the multimeter and activate the starter. This will pull a high current through the battery very quickly. Switch the engine back off and check the readings. The range should not be below 9.6V – 10.5V (depending on the CCA rating and temperature of the battery). If it is below this range, the battery is likely to need replacing.
How do I maintain my ATV battery?
ATV batteries should last for around 3 or 4 years on average. This will vary according to the charge quality, the usage of the battery, and the build quality. If you use your battery often, it will deteriorate faster.
You should try to store your ATV battery at a stable temperature. It should not be too hot or too cold as this can cause the acid and internal elements to decompose. It is a good idea to store it in a cool room, covered with a blanket or a rubber protector in the colder months.
You should always use the charger supplied with your battery. Cheaper battery chargers may seem like a bargain but they will cause your battery damage.
You should clean your battery regularly to extend its lifespan. Pay particular attention to the terminals, where the leads are connected. This is where you are most likely to see build up of engine gunk that can cause important parts to corrode. A large quantity of build up can also prevent a good connection forming between the leads and terminals – meaning your ATV will not switch on.
To clean the terminals, you must first detach the leads. Grab a wire brush and use this to scrub at the layer of grime. You can use a specially formulated battery cleaner to help you get it off. Once it is clean, we recommend coating the terminals in a protective solution to extend their lifespan. You should be able to find this at any good auto-parts store.
How often should you charge your ATV battery?
One of the best ways to extend the lifespan of your ATV battery is to keep it fully charged at all times. It is usually a good idea to take a portable charger with you when you go out. This allows you to charge the battery while you are riding.
ATV batteries contain a lead acid. They should be charged at least once per month if you do not have a smart charger. These are chargers designed to keep the voltage at the optimal level for battery life. They reduce the current traveling through to almost nothing. This stops the battery from overcharging, even if the charger is left on.
ATV batteries do something known as self discharging when left inactive for some time. This means that they begin to lose their charge even if they are not connected to anything that is using power. The additional benefit of smart changers is that it prevents this from happening. This is why they are also sometimes referred to as constant maintenance chargers.
If the lights on your ATV will not switch on and the engine does not start, this indicates that your battery needs to be replaced. If the battery will not charge, or you hear odd sounds coming from the engine these also indicate the battery has reached the end of its life.